issac p
Silver Member
Painted Parts
1.Make sure that your part is painted, not anodized. This tutorial won't work on anodized parts.
Most aluminum will be anodized (wheels, forks, etc.)
Most steel will be powdercoated/painted(most bars, proto forks, etc.) Use paint stripper.
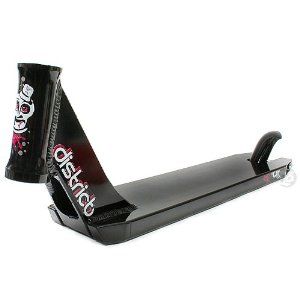
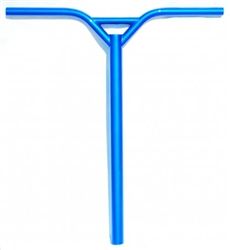
Here are examples of painted parts.
Here are examples of anodized parts.
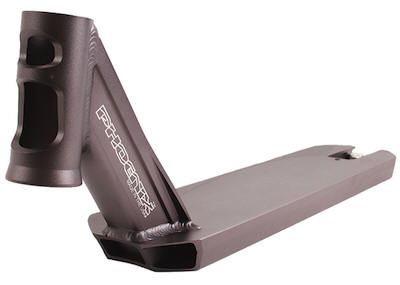
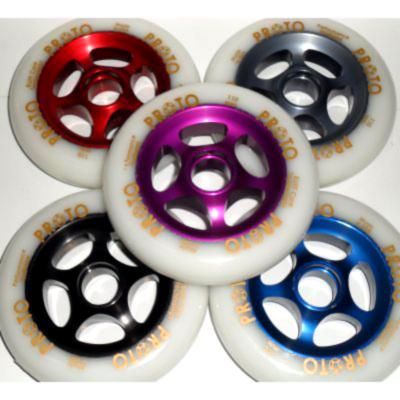
see the difference?
also, anodized parts dont chip and flake like painted parts.
2.Get some good paint remover. I've found that the ones labeled "aircraft remover" work best. This can be found at hardware stores and at a few auto parts stores. It should cost somewhere around $7.
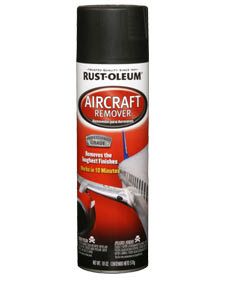
3.Do this outside, or in a very well ventilated area. The chemicals in the paint remover are hazardous, and you should try not to breath or make contact with them as much as possible. THEY CAN BURN YOUR SKIN AND IT STINGS REALLY BAD. I strongly recommend that you were gloves, safety glasses, etc.
4. Apply the paint remover to your part similarly to how you would paint something. After applying the stripper to the part, it should look something like this after a few minutes.
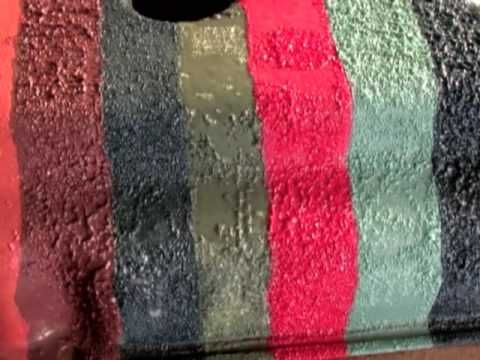
Once this happens, simply wipe off the paint. If there is still more paint left, try again.
5. If the part is steel, i recommend that you paint or clear coat it as soon as you're done stripping it because you dont want it to rust.
Anodized Parts
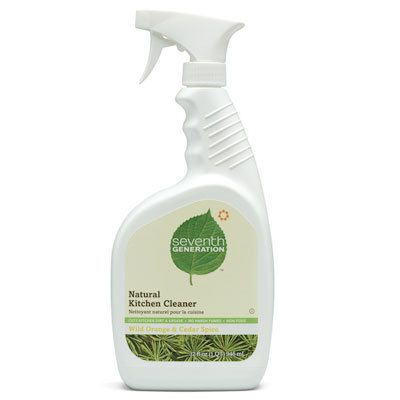
1.) Get yourself some heavy duty kitchen cleaner. You don't want any of that eco-friendly stuff, you want some heavy duty cleaner. Get the cleaner that looks the strongest.
Examples of what not to use.
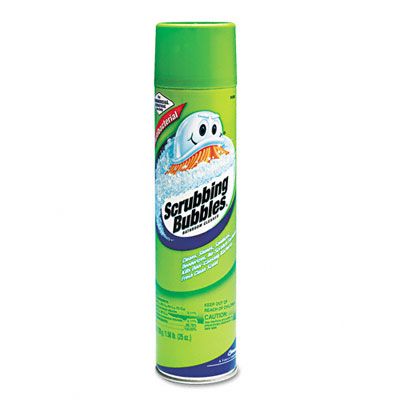
An example of what works good.
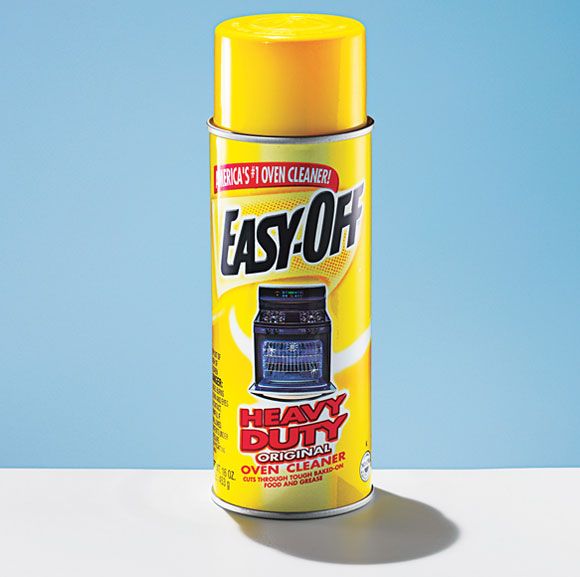
2.Get a sealable bag that your part will fit in. Fill about a fourth of the bad with your cleaner. Put your part in the bag and make sure it is sealed; you dont want to get cleaner all over yourself. Next, shake the bag and rub your part(lol) for a few minutes, until the cleaner starts to look really dirty and is slightly the color of your product.
3. If you used the right stuff, your product should be completely raw. Sometimes the part will still have some spots of its old color, or will just be slightly faded. If this happens, repeat the process and/or try a different cleaner.
- If you're rawing am anodized deck, spray the cleaner onto the deck and leave it on for about 10-15 minutes, then wipe it off. I've found that this usually takes a few tries.
- It is safe to raw wheels. It doesnt seem to damage the urethane. Just make sure to leave the bearings in the wheel, because the cleaner could ovalize your wheel.
Printed Graphics
This tutorial will teach you how to remove printed on graphics found on products from addict, district, etc.
1.) Acquire some automotive brake cleaner. This is what I used. I'm not sure how much it is, but you should be able to find it at any auto parts store.

2.) Figure out how many cans you will need. I used 2 cans to remove the downtube graphic from my mckeen bars. Keep in mind that this is the only time I have ever removed a graphic, so please dont ask me how many cans you will need to remove whatever graphics.
3.) Once you have the brake cleaner and a good sponge with a rough side, spray a bunch of cleaner on one part of the graphic. The cleaner evaporates fast, so start scrubbing off the graphic as soon as you spray on the cleaner.
4.) I found that working in small areas worked better than trying to remove the whole graphic all at once. I don't remember exactly how long it took to remove the whole graphic, but i do remember that it did take a while. Just be patient. The more effort you put in, the better the result.
5.) In the end, I had like an outline of where the graphic used to be, but it like faded away after a while. Im assuming it was because i didnt remove the graphic until after a few months of having the bars, so the part that wasnt covered by a graphic was exposed to grease, oil, water, and whatnot. The outline was hardy noticeable, and like i said early, faded away after a while.
If you have any questions, feel free to post them. Hope this helps!
1.Make sure that your part is painted, not anodized. This tutorial won't work on anodized parts.
Most aluminum will be anodized (wheels, forks, etc.)
Most steel will be powdercoated/painted(most bars, proto forks, etc.) Use paint stripper.
Here are examples of painted parts.


Here are examples of anodized parts.


see the difference?
also, anodized parts dont chip and flake like painted parts.
2.Get some good paint remover. I've found that the ones labeled "aircraft remover" work best. This can be found at hardware stores and at a few auto parts stores. It should cost somewhere around $7.

3.Do this outside, or in a very well ventilated area. The chemicals in the paint remover are hazardous, and you should try not to breath or make contact with them as much as possible. THEY CAN BURN YOUR SKIN AND IT STINGS REALLY BAD. I strongly recommend that you were gloves, safety glasses, etc.
4. Apply the paint remover to your part similarly to how you would paint something. After applying the stripper to the part, it should look something like this after a few minutes.

Once this happens, simply wipe off the paint. If there is still more paint left, try again.
5. If the part is steel, i recommend that you paint or clear coat it as soon as you're done stripping it because you dont want it to rust.
Anodized Parts
1.) Get yourself some heavy duty kitchen cleaner. You don't want any of that eco-friendly stuff, you want some heavy duty cleaner. Get the cleaner that looks the strongest.
Examples of what not to use.


An example of what works good.

2.Get a sealable bag that your part will fit in. Fill about a fourth of the bad with your cleaner. Put your part in the bag and make sure it is sealed; you dont want to get cleaner all over yourself. Next, shake the bag and rub your part(lol) for a few minutes, until the cleaner starts to look really dirty and is slightly the color of your product.
3. If you used the right stuff, your product should be completely raw. Sometimes the part will still have some spots of its old color, or will just be slightly faded. If this happens, repeat the process and/or try a different cleaner.
- If you're rawing am anodized deck, spray the cleaner onto the deck and leave it on for about 10-15 minutes, then wipe it off. I've found that this usually takes a few tries.
- It is safe to raw wheels. It doesnt seem to damage the urethane. Just make sure to leave the bearings in the wheel, because the cleaner could ovalize your wheel.
Printed Graphics
This tutorial will teach you how to remove printed on graphics found on products from addict, district, etc.
1.) Acquire some automotive brake cleaner. This is what I used. I'm not sure how much it is, but you should be able to find it at any auto parts store.
2.) Figure out how many cans you will need. I used 2 cans to remove the downtube graphic from my mckeen bars. Keep in mind that this is the only time I have ever removed a graphic, so please dont ask me how many cans you will need to remove whatever graphics.
3.) Once you have the brake cleaner and a good sponge with a rough side, spray a bunch of cleaner on one part of the graphic. The cleaner evaporates fast, so start scrubbing off the graphic as soon as you spray on the cleaner.
4.) I found that working in small areas worked better than trying to remove the whole graphic all at once. I don't remember exactly how long it took to remove the whole graphic, but i do remember that it did take a while. Just be patient. The more effort you put in, the better the result.
5.) In the end, I had like an outline of where the graphic used to be, but it like faded away after a while. Im assuming it was because i didnt remove the graphic until after a few months of having the bars, so the part that wasnt covered by a graphic was exposed to grease, oil, water, and whatnot. The outline was hardy noticeable, and like i said early, faded away after a while.
If you have any questions, feel free to post them. Hope this helps!
